New Bedford, Massachusetts homeowners looking to install a fence have a variety of options and considerations. Before breaking ground, careful planning is essential. This includes obtaining any necessary permits, conducting a property survey, and selecting materials suited for the local climate. The right tools and equipment are also vital for a successful installation. Following a step-by-step guide ensures a sturdy fence while proper sealing and ongoing maintenance promise longevity against New Bedford’s diverse weather conditions.
- Planning Your Fence Installation: Permits and Property Survey
- Choosing the Right Material for Your New Bedford Climate
- Tools and Equipment: Gathering Essential Items Before You Start
- Step-by-Step Guide: Post Setting and Board Installation
- Finishing Touches: Sealing and Maintenance Tips for Longevity
Planning Your Fence Installation: Permits and Property Survey
Before starting your DIY fence installation project in New Bedford, ensure you have all the necessary permits from local authorities. Different towns and cities have distinct regulations regarding property alterations, so checking with the New Bedford Planning Department or similar body is crucial to avoid any legal issues. This process typically involves submitting an application detailing your construction plans, after which a representative will review it for compliance with zoning laws and building codes.
A property survey is another essential step in planning your fence installation. This involves assessing your land’s boundaries and features like trees, utility lines, or existing structures. Accurate measurements will guide the design and placement of your fence, ensuring it aligns with local regulations and maximizes the functionality and aesthetic appeal of your outdoor space.
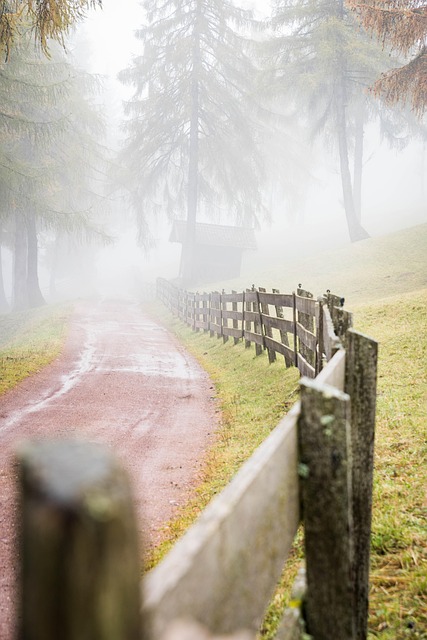
Choosing the Right Material for Your New Bedford Climate
When considering DIY fence installation in New Bedford, Massachusetts, selecting the appropriate material is key, especially when accounting for the region’s climate. The harsh New England winters and hot, humid summers demand durable and weather-resistant options. Wood remains a popular choice due to its aesthetic appeal and relative affordability. However, treated wood varieties are recommended over natural options, as they’re better equipped to withstand decay and insect damage.
For areas prone to snow and ice, opt for fence materials with a higher resistance to splitting and warping. Vinyl is an excellent alternative, offering low maintenance and superior resilience against extreme temperatures. It’s also virtually maintenance-free, making it ideal for homeowners looking to avoid regular painting or sealing. Consider the long-term benefits of these climate-conscious choices to ensure your New Bedford fence stands the test of time.
Tools and Equipment: Gathering Essential Items Before You Start
Before you begin installing your new fence, it’s crucial to gather all the necessary tools and equipment. New Bedford weather can be unpredictable, so having everything you need beforehand will save time and frustration. Essential items include a measuring tape for accurate dimensions, a level to ensure your fence is straight, post-hole digger or power drill with an attachment for digging holes, a hammer or power screwdriver for setting posts, string line for alignment, and any tools specific to the type of fence you’re installing (like a saw for wood or cutting tool for vinyl).
Don’t forget protective gear like work gloves, safety glasses, and ear protection. Having these ready ensures you stay safe while working on your project. Additionally, clear a wide workspace around the area where the fence will be installed, removing any obstructions that could interfere with digging or measuring.
Step-by-Step Guide: Post Setting and Board Installation
Setting posts and installing boards is a crucial step in DIY fence installation. Begin by marking out your desired fence line with spray paint or string for precise measurement. Dig holes for each post, ensuring they are deep enough (typically 1/3 to 1/2 the height of the post) and wide enough (approximately 8-10 inches in diameter). Use a level to ensure posts are plumb before filling the holes with concrete. Allow the concrete to set completely, usually 24-48 hours.
Once the posts are securely in place, attach the fence boards starting from one end. Use nails or screws and make sure they’re fastened at an angle for added strength. Overlap the boards slightly as you work along the fence line to create a seamless finish. Regularly check for level and adjust as needed. Continue until all boards are installed.
Finishing Touches: Sealing and Maintenance Tips for Longevity
After completing the fence installation, sealing is a crucial step to protect your new fence from the elements. Use a high-quality sealant designed for outdoor use and follow the manufacturer’s instructions for application. Regular maintenance will also contribute to longevity. This includes cleaning the fence regularly to remove dirt and debris, checking for loose or damaged boards, and promptly replacing any worn-out components. A simple annual inspection can help catch potential issues early on, ensuring your fence remains in top condition for years to come.